How to Use Reverb to Create Depth in Your Drums
You’ve probably heard songs with drums that have a great sense of depth. The vocals are right up front in the mix, and the kick drum is present without conflicting with them. Maybe the 909 snare drum is laid back a bit in the mix—it feels “further away.” The toms come in every once in a while on fills and are even further back than the snare. The cymbals come in as nice little occasional splashes above all the rest of the action—they create a sense of ambience, but you don’t really notice them unless you’re actively listening for them. And there are occasional subtle sound effects and percussion way off in the distance.
How can you achieve a sense of depth in your own drums? It comes down to a variety of techniques. You’re probably aware that reverb and delay effects simulate the kinds of echoes you’d hear in real life when a sound is far away. So generally speaking, the more reverb and delay you use on a sound, the farther away it sounds. However, getting a really good sense of depth in your drums is more complicated than that.
In this article, I’m going to briefly talk about how sounds change when they travel a long distance to get to your ears. By using mixing tools to re-create what naturally happens in the real world when sounds are far away, you can create a realistic illusion that your drums—or whatever other instruments you want—are far away. That’s how you get a great sense of depth in your drums.
Volume
Of course this sounds obvious—but the farther things are away from you, the quieter they are. If you want a drum to sound far away, you have to turn it down! (Don’t worry, there’s more to it than that. Keep reading.)
EQ
- Think about when you’re outside of a party where loud music is playing. You can’t hear the music perfectly clearly—it sounds muffled. In other words, the high frequencies are being dampened.
- The longer the distance that sound travels, the more it gets muffled. Low frequencies can travel far, but high frequencies don’t make it as far. Another example of this phenomenon is thunder. If you were close to where lightning struck, it would sound like a loud crack. But when you’re miles away, you only hear a low-frequency rumble.
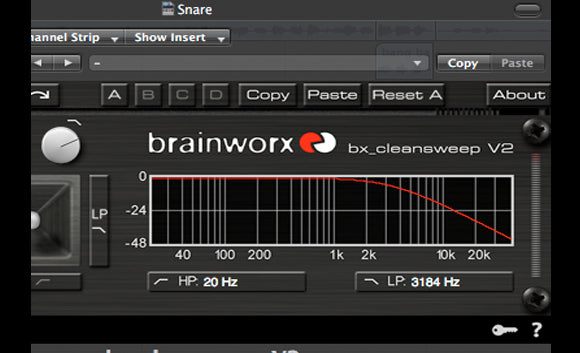
So when you want to push one of your drums back in the mix, you have to dampen the high frequencies. You can do that by putting a low-pass filter on the drum part you want to push back in the mix. For a natural effect, try a gentle slope (like 12 dB/octave, which is a 2-pole filter). Try setting it at a frequency somewhere in the range of 3000 – 15,000 Hz, depending on the drum and how far you want to push it back in the mix. Use your ears to tweak and get the amount of dampening you want.
One great plugin for this effect is the free Brainworx bx_cleansweep filter plugin. It has a super-gentle 6 dB/octave (1 pole) slope, which is hard to find even on paid plugins, and it sounds great too.
You can also make the dampening effect even more subtle by cutting the high frequencies using a shelf filter instead of a low-pass filter.
You may also want to consider cutting the low frequencies a bit. When a sound is very close to you, you hear more low frequencies than you do when it’s a few feet or more away. This is called the proximity effect. You can hear it when you record an artist—if they crowd the microphone, performing less than about 6 inches from the mic, you’ll record too much low end in their voice.
So sometimes trimming the low frequencies (below about 150 Hz) can push your drum sounds back in the mix as well, improving your sense of depth. For this application, you’d want to use a low shelf, not a filter. I wouldn’t recommend trimming more than about 6 dB, unless you already wanted to cut the low end anyway for other reasons.
Reverb
All of the above concepts are important, and without keeping them in mind, it will be hard to convincingly push your drums back in the mix. But we often think of reverb and delay as the effects that make the biggest difference in creating a sense of depth and ambience in your mix.
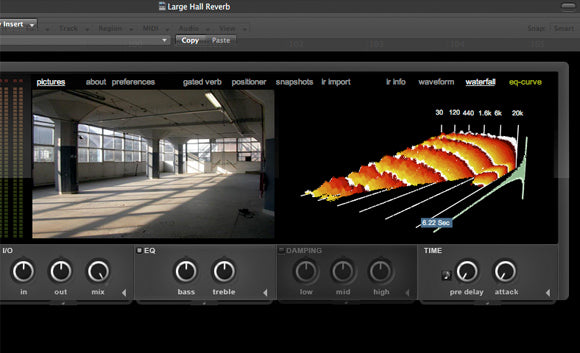
If you want to push a drum back in your mix, do all of above stuff in this article, and then send that drum to an aux track with a reverb effect on it. There are lots of different kinds of reverbs, and there’s more than one way you could use reverb to push your drums back in the mix. But a hall reverb is a good place to start for creating a sense of depth.
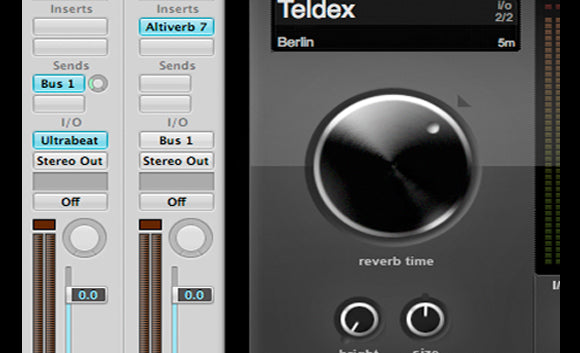
To push drums further back in the mix, use a higher send level. The higher the send, the louder the reverb is compared to the “dry” (unaffected) drum, and the further away the drum seems. I typically use a send level of -10 to -20 dB when I’m using reverb to create a sense of depth. Go closer to -10 dB (or maybe even higher) for drums you want to push further back in the mix, and use a lower send level for drums you want to be closer.
These are the basics of how to create a sense of depth in your drum samples. But there are more techniques than just these to push your drums back in the mix. One obvious effect for creating depth that I didn’t discuss in this article is delay. There are other factors that can affect how far away your drums feel too, like widening. Come back soon for another article full of more tips for making your drums seem deeper, farther away, and more spacious!
In the meantime, please let me know in the comments if you’d like more information on any of the techniques I wrote about in this article. Also, let us know in the comments below—what is your favorite song with a nice, deep drum sound?
Next →
← Previous


